Starting or Opening a Project
When Vesta is opened, you can start a new project or open an existing project file (extension is *.gmd.)
Note that Vesta is not compatible with project files created with other BioMedware software products, such as SpaceStat, ClusterSeer or BoundarySeer. If you have further questions, please do not hesitate to contact our team support@biomedware.com.
Any shapefiles generated from other software products should be compatible with Vesta, however some reformatting may be required. See the Data Preparation section for more details about appropriate data file formatting.
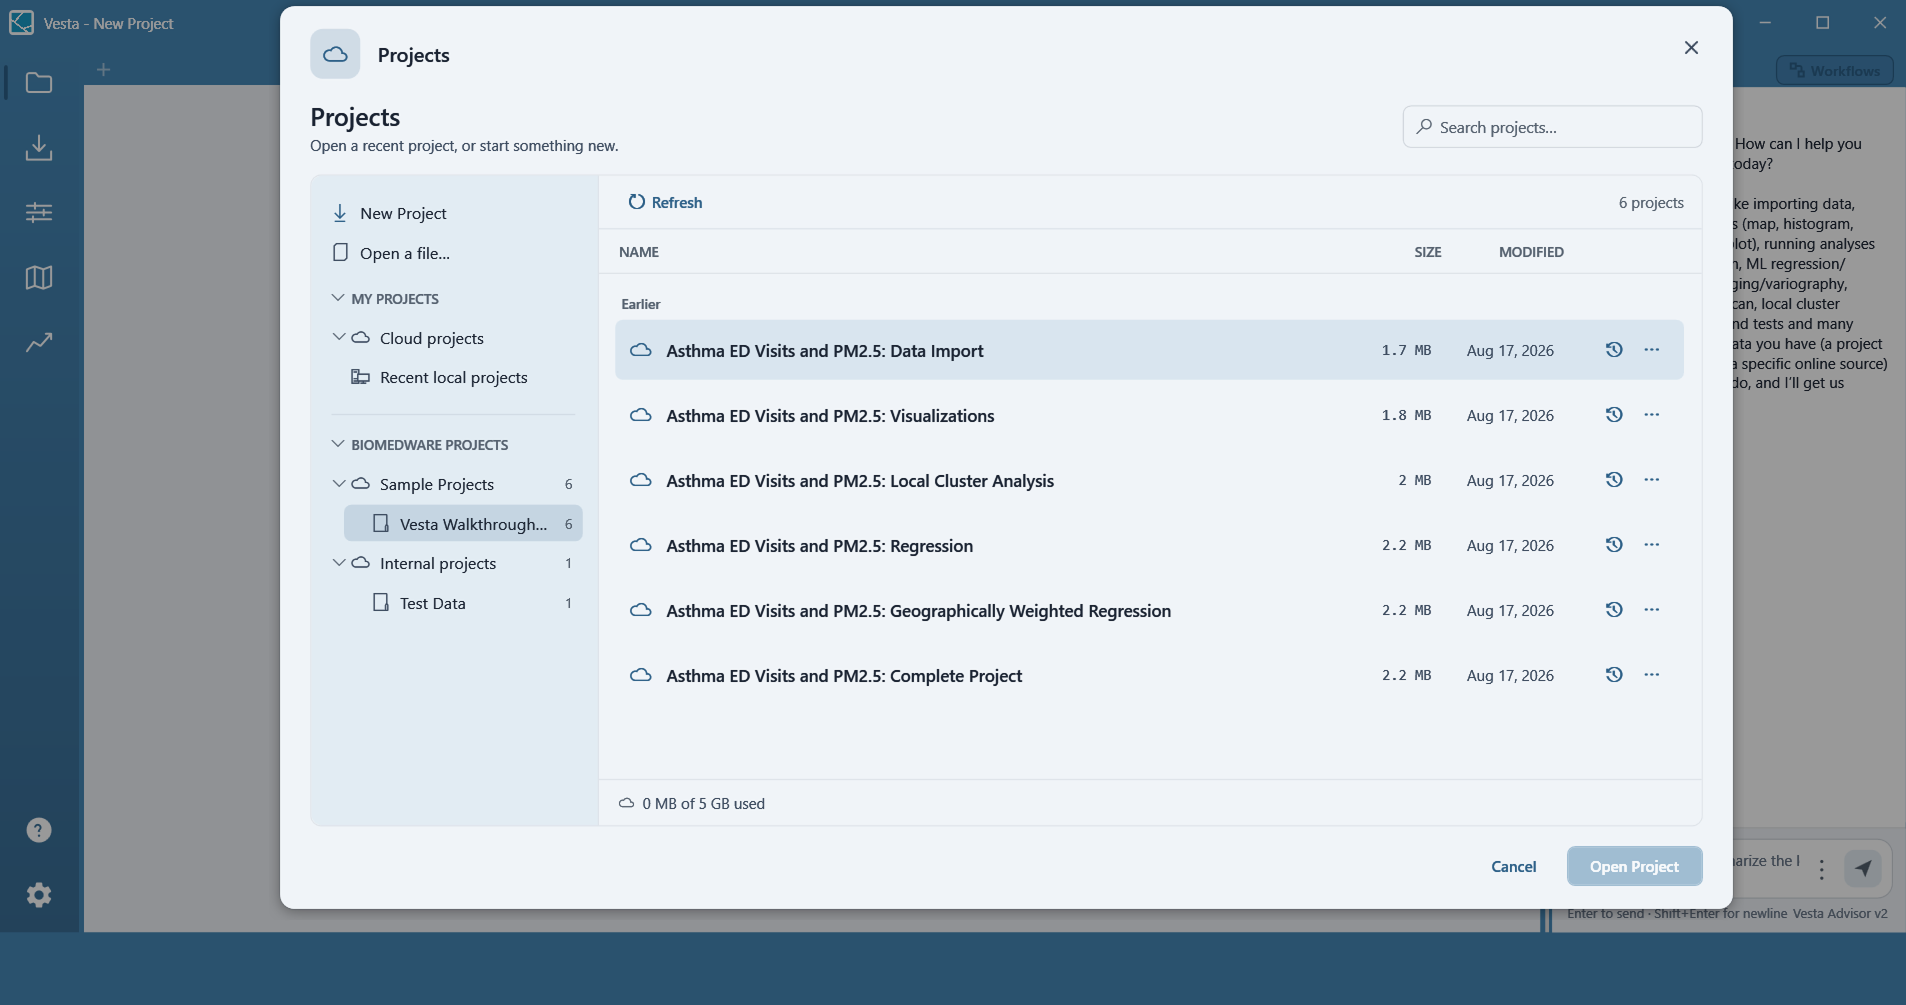
The Projects Hub
Projects are opened, saved, and organized from the Projects hub in the main rail (see Navigating Vesta).
- If the current project doesn't yet have a writable home, Save to cloud and Save to file buttons at the top save it to the cloud or to a local file, respectively. Save to cloud saves into whichever folder is selected in the rail.
- Once a project already has a home, these collapse into a single Save button that saves in place, with a chevron for Save a copy to cloud… or Save a copy to file….
- A search field and a Refresh button help find and update the project list.
- My Projects lists your own work: New Project, Open a file..., New Folder (to organize your projects into folders), All projects, and On this PC.
- BioMedware Projects lists curated projects provided by BioMedware, including Sample Projects — see Welcome to Vesta Home for more on these.
- Each project in the list shows its size and when it was last modified, with icons to view its version history or share it with a collaborator.
- A storage indicator shows how much of your cloud storage allowance has been used.
Starting a New Project
Select New Project from the Projects hub. Once a dataset is created (see Importing Data), save the project using Save to file to save it locally (extension is *.gmd), or Save to cloud to store it online.
Cloud Projects
Saving a project to the cloud stores it online instead of, or alongside, a local file. Cloud projects can be organized into folders, given descriptions, and shared with collaborators. Each version saved to the cloud keeps a record of its author, and earlier versions can be viewed and restored from a project's version history.
Opening and Saving a Project File
To open a project, select it from All projects, On this PC, or BioMedware Projects in the Projects hub, then click Open Project. To open a local file directly, select Open a file... and navigate to it. The program will display the datasets saved in that project. See the Visualizations page for directions on creating maps and charts.
To save changes, use Save to file or Save to cloud from the Projects hub, depending on where the project is stored.
Saving from the Title Bar
A save chip on the title bar mirrors the project's save state at all times — showing whether the project has no saved home yet, has unsaved changes, is fully saved, or is currently saving — and can be clicked to save immediately. The keyboard shortcut Ctrl+S saves from anywhere in the app. A save that fails leaves your project file untouched, so a save error can't corrupt work already on disk.